 Ask Us
Printing
Overview
Printing at E.J. Pratt Library is available in black and white (15 cents per side per page) and colour (50 cents per side per page). By default, all print jobs are printed double-sided. If you would like to print your document single-sided, please refer to these instructions. Printing is payable by TCard.
If you require technical support, please ask for help at the IT Support Desk, located on the main floor in the South Information Commons.
How to print from...
Adding Money to Your TCard
To add money to your account please visit the TCard+ website at https://tcardplus.utoronto.ca/ and select add funds.
Library visitor cards can be purchased at the circulation desk at a cost of $5 each and they come with a balance of $4.
Location of the Printing Station
The printing station is located next to the IT Support Desk, adjacent to the South Information Commons.
Quick Print Station
The quick print station is intended for users who do not require to make any changes to their documents before printing. It is located on the main floor, next to the IT Support Desk.
You are not required to sign in with your UTORid to use the workstation, but there is a ten-minute limit for use. If you need to edit your document before printing, please use one of the workstations in the South Information Commons.
Printing from Computer Workstations
Printing is available from all workstations in the library. To print your document, login with your UTORid to one of the workstations and open the file you want to print.
- Before you print, select the Print Preview option in the program to make sure that the document looks the way you want it to. If needed, make any necessary changes and save the file.
- Printing PDF documents directly from the browser: make sure to click the print icon from within the PDF window, and not the print icon from the browser menu.
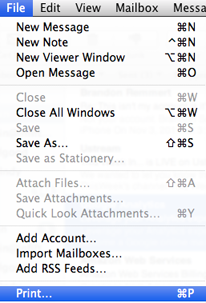
- Go to File » Print. This dialogue window will appear on the screen:
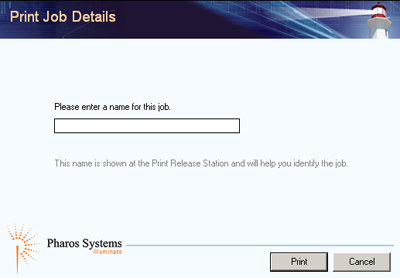
- As prompted, enter a name for your print job. Please remember it as you will need it later to select your document at the printing workstation. Then, click Print.
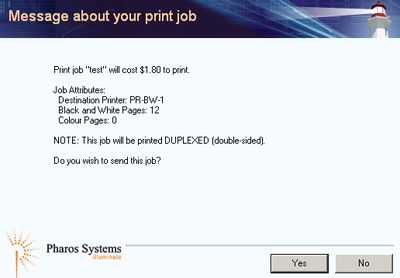
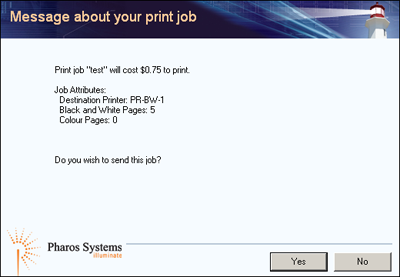
- The second dialogue window will appear on the screen, providing you with the name and the price of your print job. Click Yes after you have verified the details.
- Proceed to the printing station, which is located on the main floor in the South Information Commons, adjacent to the IT Support Desk.
- Swipe your TCard into the card reader at the printing station. The screen will now display a list of print jobs.
- Click on the job with the name that you assigned it. Click Print. The printer will now release the job and the cost of printing the document will be deducted from your current balance.
- To end your session click logout on the screen
Previewing your document:
The library will not issue refunds for print jobs that were printed incorrectly. It is the responsibility of the users to ensure that they preview their documents before printing.
Single-Sided Printing
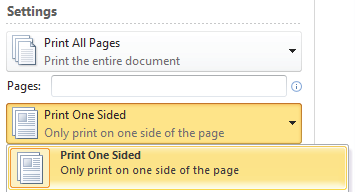
By default, all print jobs are printed double-sided. However, the settings can be modified to print your document on one side of the page.
Windows
- Open your document and go to File » Print.

- Under Settings, go to Print on Both Sides » Print One Sided.
- Click Print.

- You will then see the first print dialogue window prompting you to provide an identifying name for your print job.
- Click Print after you have entered a name. The second dialogue window will appear on the screen, providing you with the name and the price of your print job. Click Yes after you have verified the details.
- Your job has now been sent to the printer and you can proceed to the printing station to release it.
Mac OS X
- Open your document and go to File » Print.
- Print dialogue window will appear on the screen. Under Print Options in the drop-down menu, select Layout.
- Under Pages per Sheet, select 1.
- Click on Preview to verify the appearance of your document before printing.
- After you checked the document, click Print. Your job has now been sent to the printer and you can proceed to the printing station to release it.
Multiple Sheets Per Page
Windows
- Open your document and go to File » Print.
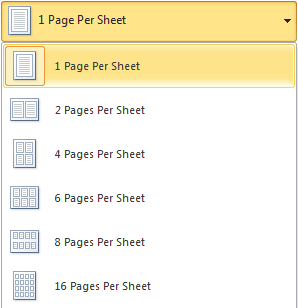
- Under Settings, click on 1 Page Per Sheet and select the desired option.
- After you checked the document, click Print. Your job has now been sent to the printer and you can proceed to the printing station to release it.
Mac OS X
- Open your document and go to File » Print.
- Print dialogue window will appear on the screen. Under Print Options in the drop-down menu, select Layout.
- Under Pages per Sheet, select the number of sheets you would like to print per page.
- Click on Preview to verify the appearance of your document before printing.
- After you checked the document, click Print. Your job has now been sent to the printer and you can proceed to the printing station to release it.
Wireless Printing
Windows
See also:
U of T Scotiabank Information Commons: Print Here
Wireless printing is available for both printers in the library (black and white as well as colour). To set up wireless printing for a Windows laptop, you have to download and install a driver for each printer.
Note: the default setting for wireless printing is single-sided.
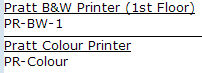
- Go to http://printhere.utoronto.ca/uniprint/packages.asp and click on Pratt B&W Printer (1st Floor) or Pratt Colour Printer.
- A dialogue window will appear. Save the file and then open it to run the installation.
- Follow the on-screen instructions to complete the installation.
- Once the installation is complete, the printer will appear on the printer list in the standard print window, as shown below.
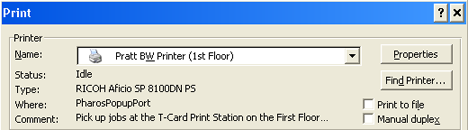
- Next time you print, your document will be sent to to printer on the main floor. After you select File » Print, the Pharos Print Screen will be displayed, as shown below:
- Enter an identifying name to your print job and then click Print. The second dialogue window will appear on the screen, providing you with the name and the price of your print job. Click Yes after you have verified the details.
- The job has now been sent to the printer and you can proceed to the printing station to release it.
Mac OS X (Black and White)
To set up wireless printing for a Mac laptop, you have to configure the details of the library printer to your print settings.
- From the Apple Menu, open System Preferences. Click Print & Fax.

- Click + button.

- Click IP.

- Enter the settings as outlined below:
Protocol: Line Printer Daemon
Address: printhere.utoronto.ca
Queue: PR-BW-1
Name: Pratt B&W Printer
Location: main floor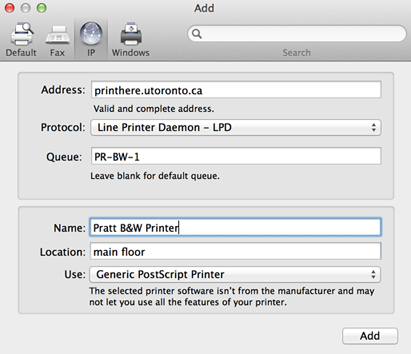
- Click Add to complete the configuration.
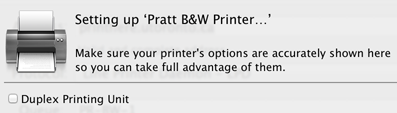
- A dialogue window will appear. Select Duplex Printing Unit if you prefer to print your document double-sided by default. If you choose not to select it, your documents will print single-sided.
- Next time you print, make sure that your document is sent to to library’s printer on the main floor. After you select File » Print, choose Pratt B&W Printer.
Mac OS X (Colour)
- From the Apple Menu, open System Preferences. Click Print & Fax.
- Click +. button
- Click IP.
- Enter the following settings:
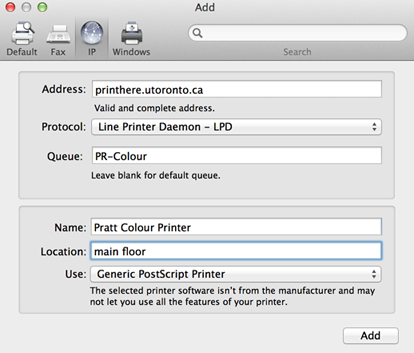 Protocol: Line Printer Daemon
Address: printhere.utoronto.ca
Queue: PR-Colour
Name: Pratt Colour Printer
Location: main floor - Click Add to complete the configuration.
- A dialogue window will appear. Select Duplex Printing Unit if you prefer to print your document double-sided by default. If you choose not to select it, your documents will print single-sided.
- Next time you print, make sure that your document is sent to to library’s printer on the main floor. After you select File » Print, choose Pratt Colour Printer.
When printing from a Mac, you will not be prompted to name your job. Instead, the name of the file that you are printing will appear at the printing station as the name of your job.
Last updated: January 19, 2024